How to keep vector illustrations crisp & HD ready for animation in After Effects CC
Roughly a 3 minute read by Adam Buchanan

As we all know the beauty of vector illustrations is having the ability to scale artwork infinitely without any degradation in quality. While this feature is pretty much a safeguard for print based designs spanning multiple paper sizes, it’s also something which can be utilised in motion graphics too.
Adobe’s Creative Cloud Suite of software is fully equipped to bring vector artwork to life, with Illustrator files being fully compatible with After Effects. Despite the fantastic compatibility between the two applications, one of the most common queries online surrounding the two packages is how to make sure vector files scale as they would in Illustrator, within After Effects.
For some, the quickest way to get round this issue of vectors blurring or pixelating in After Effects is to make the original artwork much larger than it needs to be. This of course works to an extent - but what happens if you then need to export your video at a higher resolution?
Without heading back to Illustrator over and over again, here’s the sure fire way to ensure your vectors are always pixel perfect and sharp within After Effects, no matter what size they are to begin with.
Enable Continuously Rasterize on vector layers
1. To kick things off you’ll need to import your artwork into After Effects. You can do this by either selecting File > Import > File / Multiple Files, or instead by dragging and dropping your assets into the project tab in After Effects.

2. With your artwork at the ready, place the vectors you want to use in a composition - arranging them and preparing them as you wish.
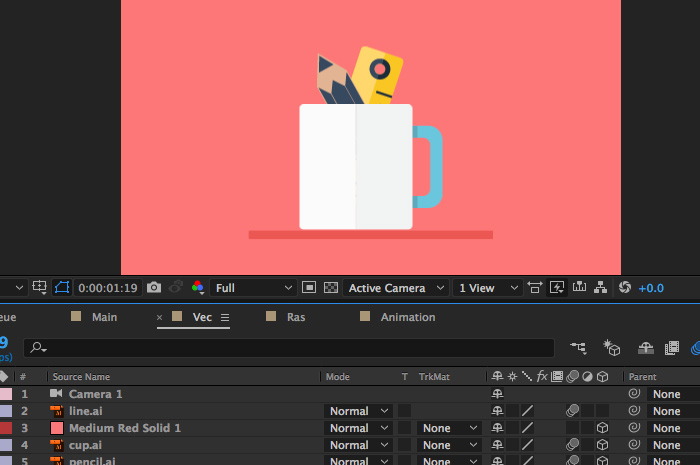
3. On each of the vector layers you intend to keep crisp whilst animating, toggle the small checkbox under the Continuously Rasterize column.

That’s it! Really.
But what does Continuously Rasterize do?
By toggling this tiny sunburst icon on each vector layer, we’re instructing After Effects to redraw the source asset on every single frame it is used.
As a result After Effects will read the shape data within our source file and then draw it from scratch every frame - rather than using a rasterized snapshot of the asset as it appears upon importing.
This means you can scale and rotate your illustrations freely without any degradation, leaving your focus on the animation instead.
Here’s a quick example of the feature in action, with flat 2D vectors being used in a faux-3D world, all whilst being continuously rasterized:
What happens if I Continuously Rasterize a non-vector layer?
As much as I’d like to say this magic toggle allows you to zoom into photographs infinitely (CSI forensics style), this feature sadly doesn’t work on rasterized images.
That said, there is one more benefit to this toggle. If checked on a composition (instead of a vector) the sunburst icon will instead enable what’s known as Collapse Transformations. Without going into too much detail of its uses (that’s another post for another time), you’ll be able to take advantage of ignoring the nested composition’s bounding boxes along with the ability to pan around 3D layers that are contained within that composition.
Conclusion
Ultimately there’s no reason as to why you shouldn’t be enabling Continuously Rasterize on every vector layer you ever import.
This does, however, raise the question “why doesn’t After Effects do this by default?” But this is Adobe we’re talking about...