6 reasons why we made the switch to Figma
Roughly a 9 minute read by Tom Horner

Earlier this year our design team, having previously used Photoshop and Sketch for our web and UI work, made the collective decision to make the switch to Figma.
Introducing changes to your daily workflow is often something which can result in a period of unfamiliarity and adjustment, but ultimately has the potential (providing you get it right) to provide long-term efficiency savings, with less time spent on process and more time spent on creating.
On our larger web projects it’s especially important for our design and development teams to maintain a close relationship, and one of the driving factors behind trialling a different approach was to see if we could use Figma to better complement each team’s respective workflows. While it seemed to fit the bill in this regard, we began a phased approach to ensure a smooth transition and in order to give ourselves time to learn its feature set.
Fast forward 4 months; and now that we’re up and running with Figma we wanted to share what we think are some of its best features, how they benefit each of our teams, and why we’d recommend making the switch.
Here’s our 6 reasons for switching…
1. Speed
So firstly, Figma is really fast! Making the switch from other well known apps is like night and day in terms of how quickly you can build your layouts and designs.
Its shortcuts are intuitive and its UI panes are contextual, meaning that they change depending on the tool you have selected. This is useful as you never find yourself having to hunt for the menu item or property that you need to edit - it’s just there when you need it.
Secondly, because Figma is cloud based (we’ll talk more about that later) all of your files and projects are held in a central location, meaning it’s really quick to jump around between them.
Speaking of speed, that leads us nicely on to our next key reason…
2. Components
Components in Figma provide two key things; speed and consistency. You can create a master component from any piece of UI that you plan on duplicating and reusing elsewhere in your design, meaning that should you decide in future to make a change - there’s only one master component that you need to edit in order to see your changes reflected throughout your design.
Overrides
The beauty of Figma’s approach, however, is that even though you may have duplicated a master component, you are still able to override each of these instances individually; changing the text, images, and even the styles. Perfect for when you want to create a layout that accurately represents real-world content.
Save time
What this means in practice is that implementing internal and external feedback becomes much less of a chore, especially when a large project spans multiple designs and pages.
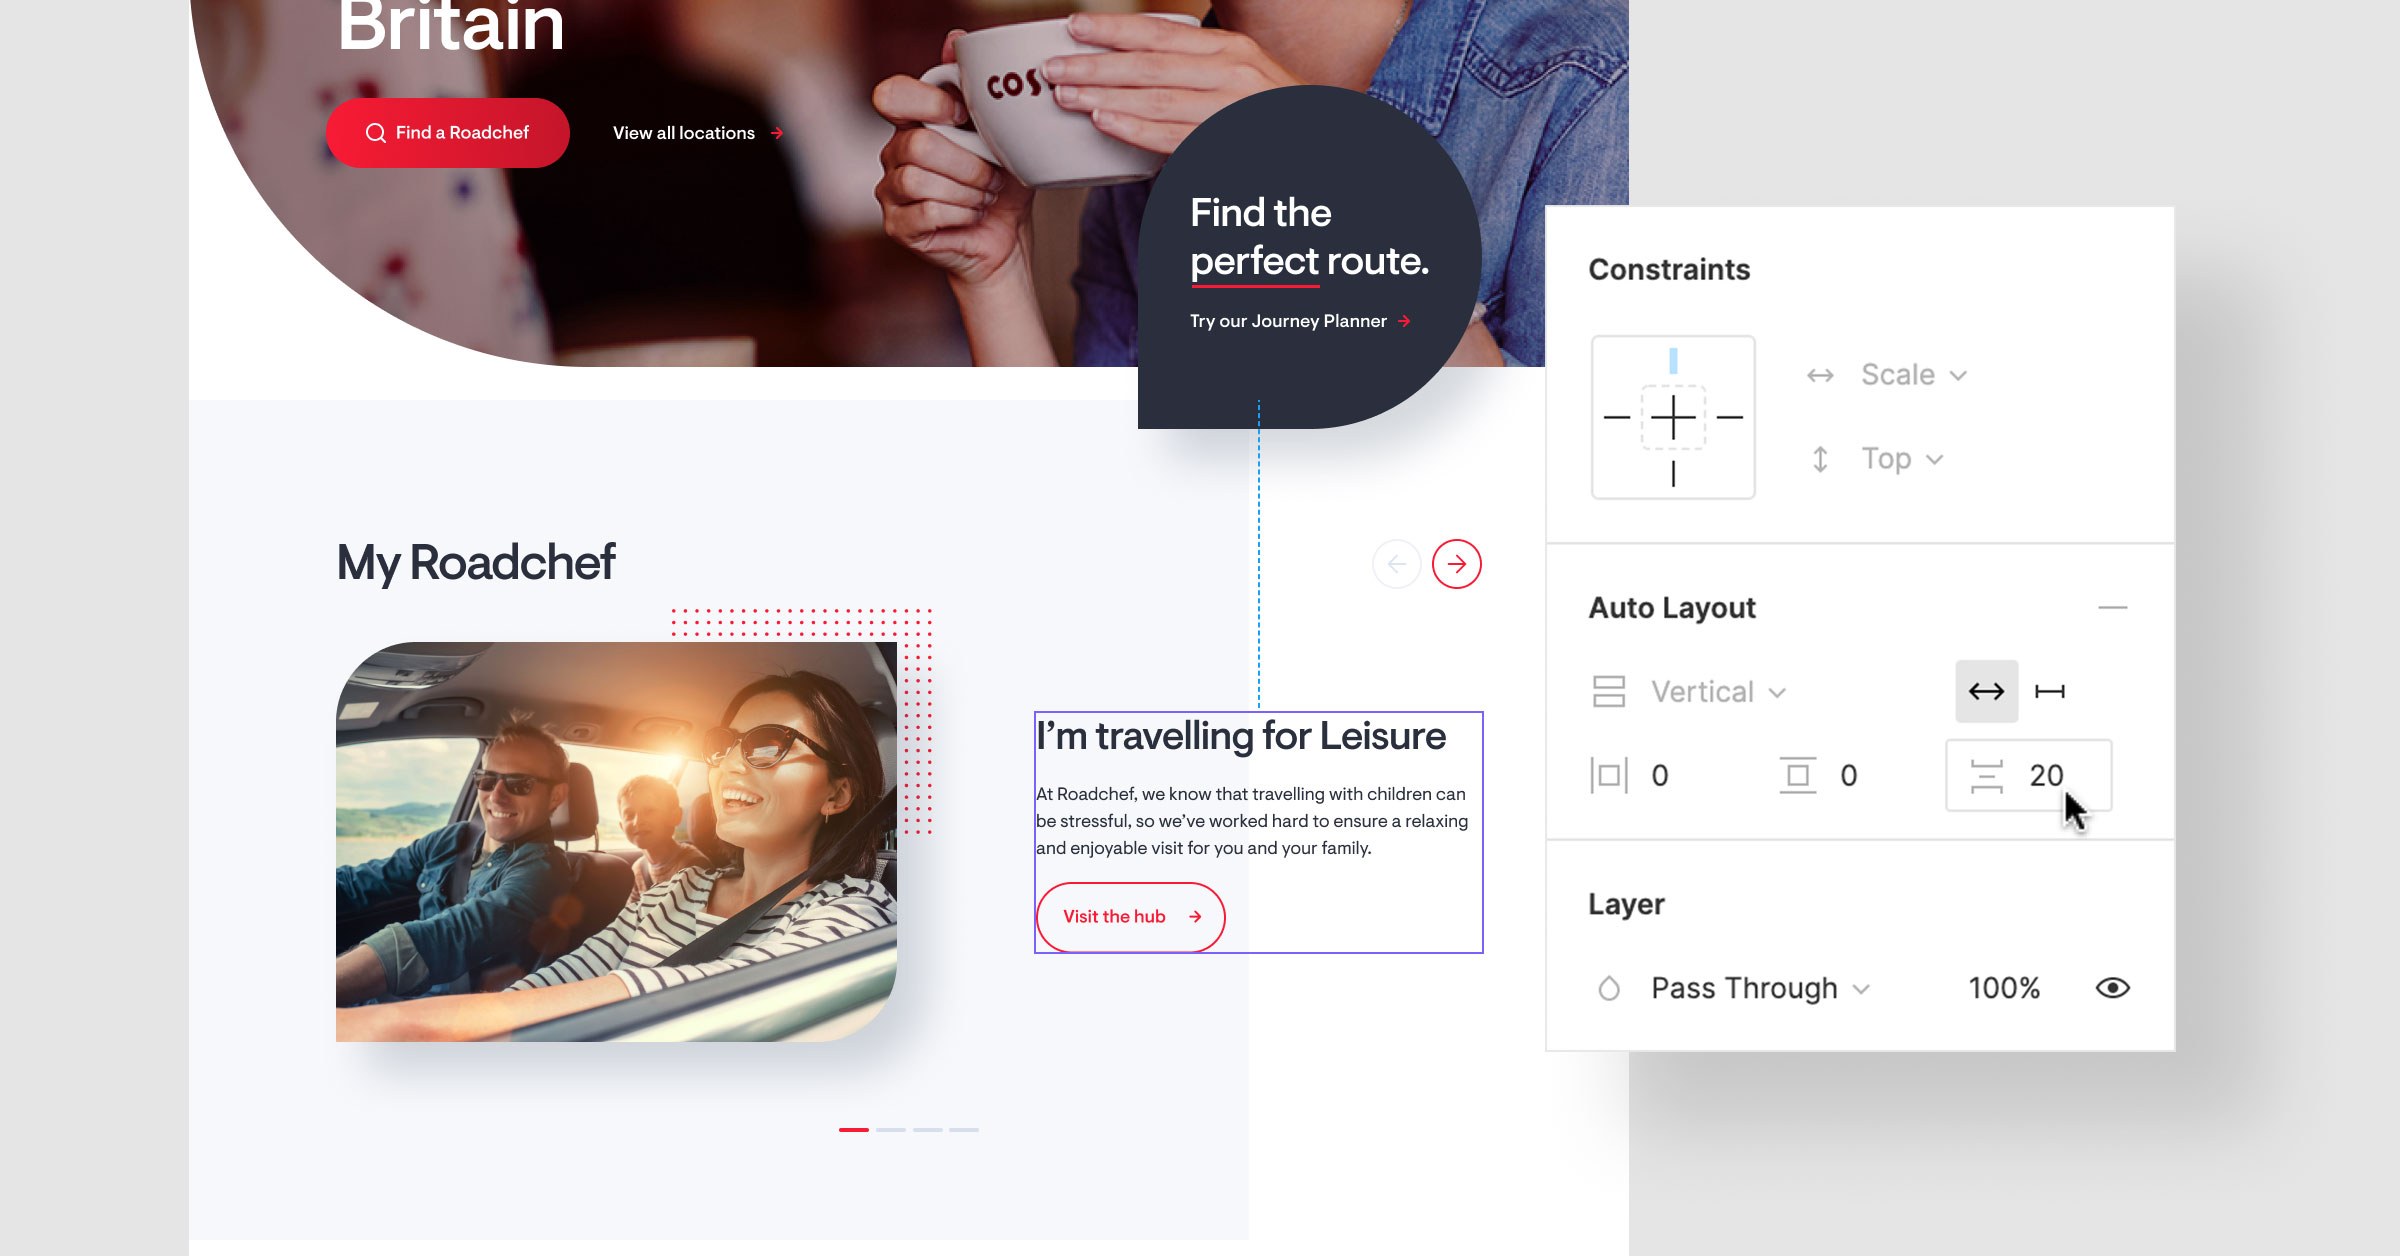
3. Auto layouts
Auto layouts are one of Figma’s most powerful features and one which both our design and frontend teams have really enjoyed pushing the limits of. These custom rules can be applied to any group or component to essentially mimic the fluidity and responsive nature of modern websites.
Build your layout
Once you have set constraints for individual elements (top left, top right, center, scale etc), adding either a horizontal or vertical auto layout means that you can control the relationship that each element has to its sibling, and also in terms of the padding by specifying the pixel values.
Editing copy which increases in length is no problem for your auto layout, it will simply wrap onto a new line, automatically moving the call to action button which you had placed below it , and retaining your pre-defined padding values in the process.
Taking things further
You can also look to nest and chain your auto layouts, extending them to whole sections of your designs. Should you need to edit or delete content you can be confident that your layout will respond accordingly.
An added bonus of auto layouts is that switching to the code tab will provide your development team with the exact values they require to build your layout.
Whilst creating an auto layout requires more time invested up front, you quickly begin to see the reward!
4. Collaboration
Team libraries
Maintaining any project or design system between multiple teams and users can become problematic, so it’s important to have a single source of truth which all team members can see, use and edit when necessary. Creating reusable styles for your typography, colours and effects is definitely recommended, however you can take things a step further in Figma by publishing these styles to the Team library. Providing your subscription plan supports it, you are then able to share your styles between different projects and team members by toggling these global styles on or off on a per-project basis.
Multiple contributors
If you are familiar working with Google’s suite of cloud-based apps, you will feel right at home with how Figma’s handles multiple contributors.
A list of avatars will appear in the top right to indicate those users currently using the file, and different colour-coded mouse cursors for each user can be seen dashing across the screen - useful for when you need to draw attention to something, but it does become distracting so thankfully this can be disabled!
Commenting
Figma allows users to add comments to specific elements of your designs, useful for when you need to have a conversation with a colleague.
You can also @ someone should you wish to ask them a question directly, and all comments and conversations are accessible from the right hand pane when the comment tool is active.
Sadly the commenting feature doesn’t extend to non-registered users, so unfortunately external clients will not be able to comment on any shared prototypes.
No more saving
All files and projects are saved in the cloud so there’s no need to actively save a file. Plus, Figma has full version control built in, so should you need to roll back or share a previous iteration - no problem.
This is also especially useful for someone new to the project, as they will no longer need to access a server and hunt down a file. Providing you have organised your Figma workspace well all projects and files are held in one central place.
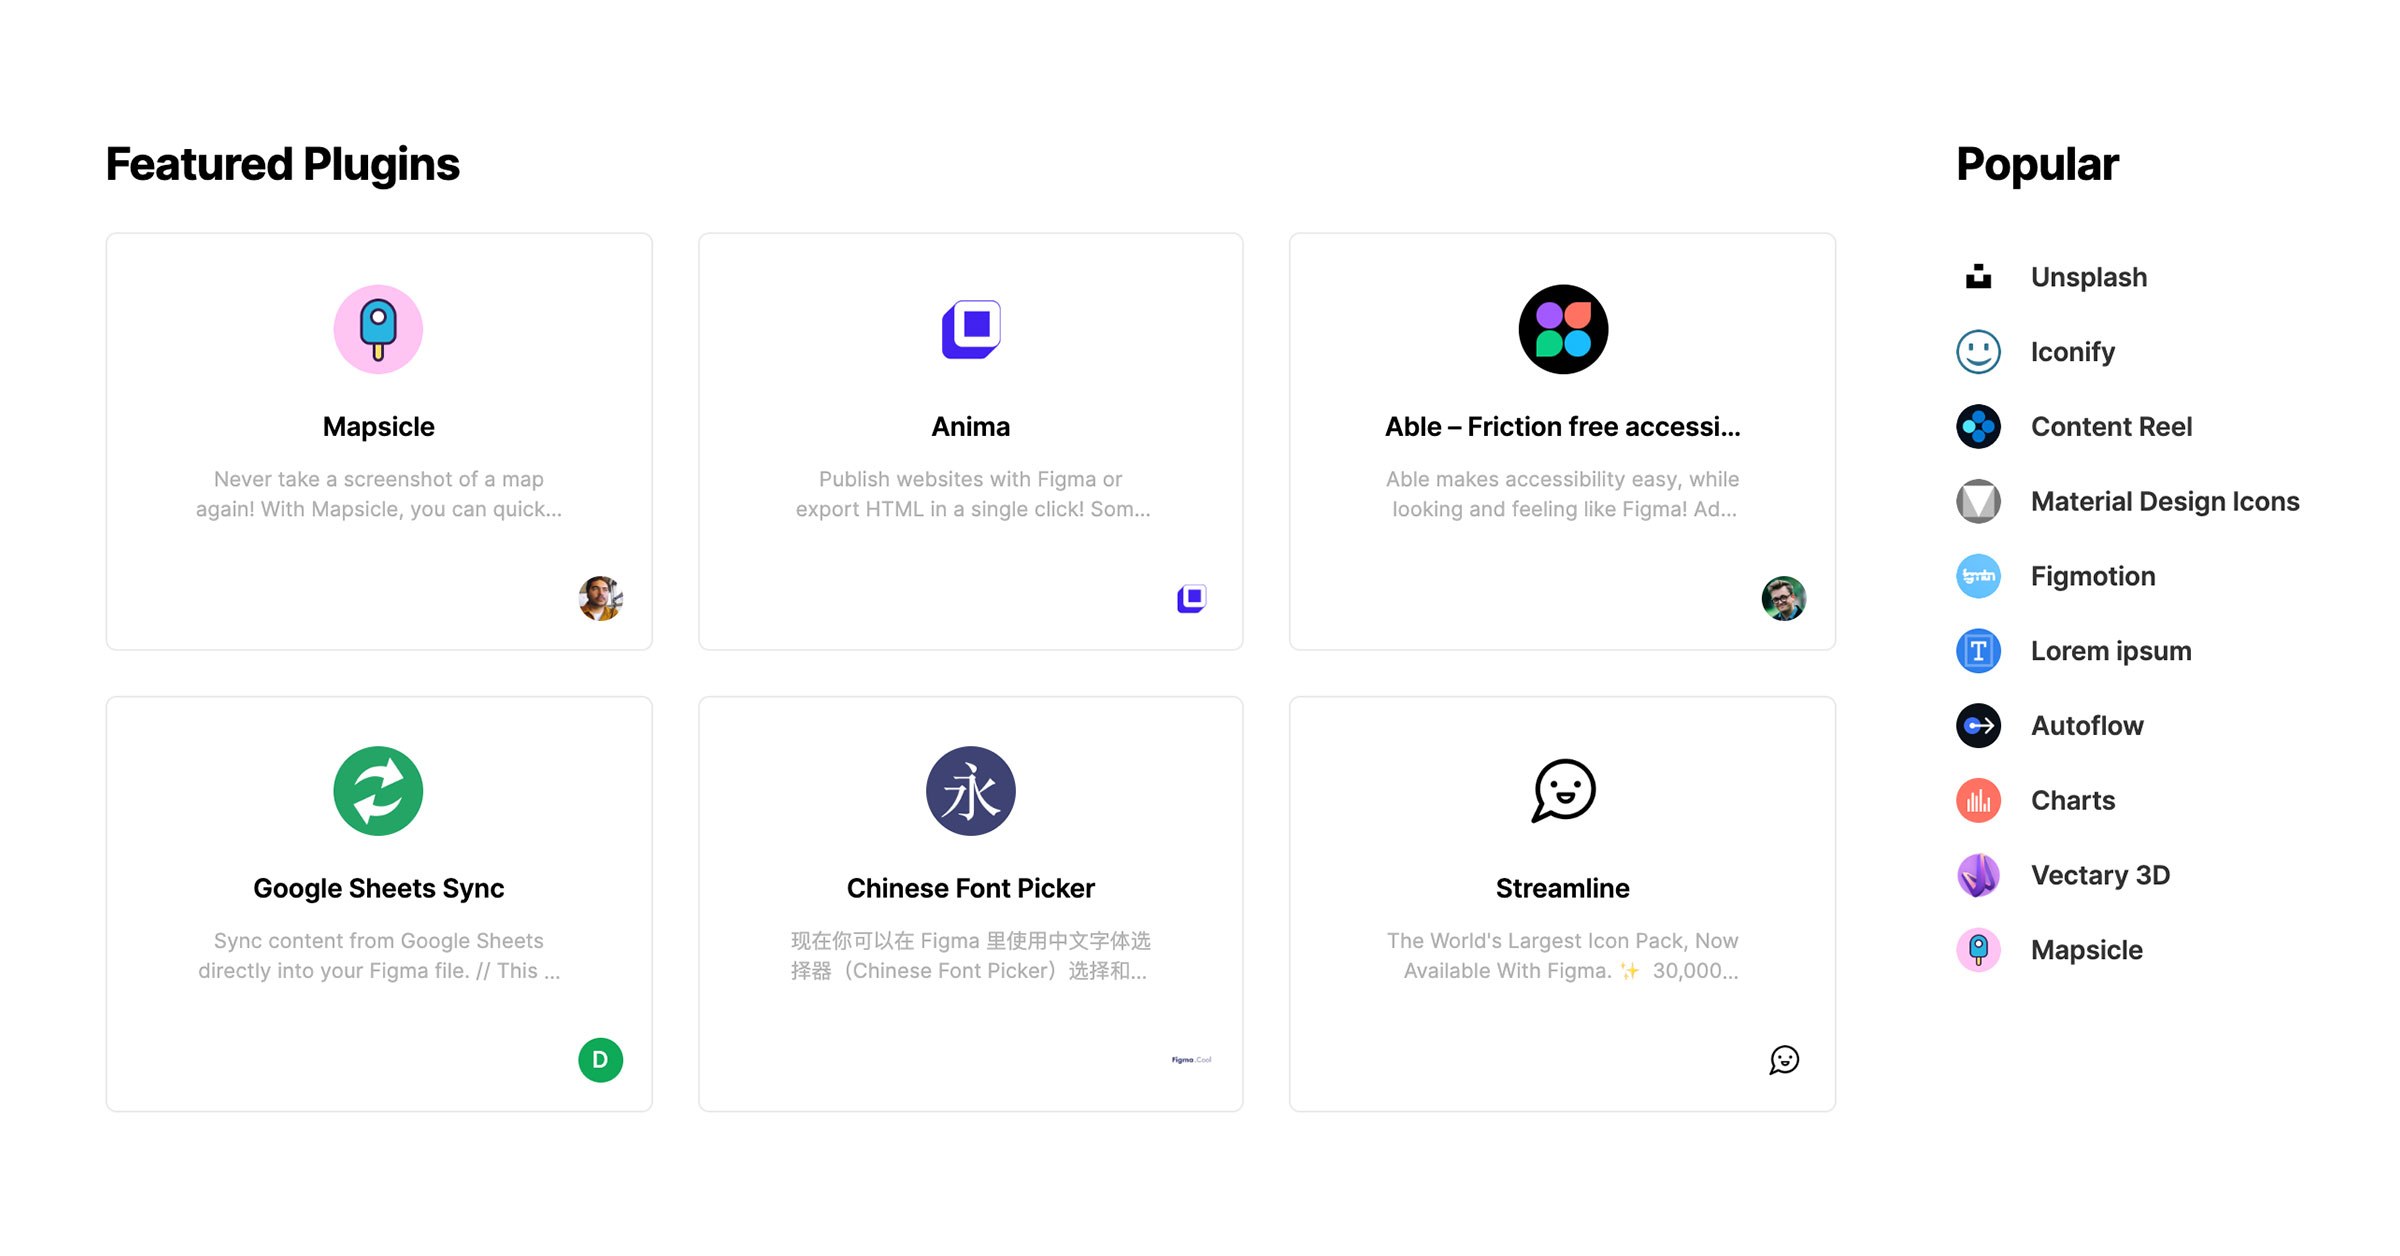
5. Plugins
Plugins are a real god send in Figma. What they provide is the ability to extend the functionality of Figma beyond its core features, and allow you to customise your experience to suit your needs.
There are seemingly more to choose from every day, including plugins that integrate with other pieces of software.
SVG Export
Figma’s native export is great, and in fact you can literally export anything; a group, a component, an image, an icon. The SVG Export plugin however is a real favourite of our front-end team due to the fact it optimises and batch exports all at once. Plus, you can also set up presets specifically for things such as icons or logos.
Here are some more of Engage’s favourite plugins:
6. In-built prototyping
Getting buy-in from either your team or client is key when presenting a design solution, and one which is definitely made easier by being as explicit as possible through the use of prototypes. There are many great options for bringing to life your static wireframes or design scamps, but having the ability to do this directly in Figma is extremely convenient.
You are able to choose from a range of transition options, animation speeds and easing, modals and overlays, devices to preview your prototype in, and much more.
That being said, more complex user journeys can become overwhelming when ‘visualised’ on the canvas, especially to someone who is new to the project file, so our experience is that it works best when kept simple.
Room for improvement
So now you’ve heard the reasons why we’ve grown to love Figma, there are some areas in which we believe they could do better…
Image handling
We find that Figma does a great job of allowing you to easily import, replace and edit images from within the app. However once an image has been imported into Figma, it can become a pain attempting to extract the original image. Our current workflow is to keep a folder of production assets that we can edit externally, so as to maintain full control and avoid importing large hi-res imagery into Figma.
Slow loading of prototypes
Prototypes which span multiple pages and with lots of imagery on each, can suffer from slow loading times when first opening a shared link. Something which you do need to be mindful of when sharing links with clients.
Sharing revisions
Following on from sharing links with clients, our next recommendation would be the ability to share a ‘snapshot’ of a design with a client, as opposed to sharing your live, working link. This is is due to the fact you often want to continue working on a file which a client is now reviewing, and because Figma is cloud based and will auto-update, any changes you make will instantly be reflected in the client version.
Organisation
When working in a team, Figma’s project dashboard can quickly become populated with various projects and files. We’d like to see an additional level of organisational control, perhaps in the form of folder creation, in order to help keep projects as organised as possible.
Stay tuned
So there you have our 6 reasons for making the switch. We’re four months into our transition to using Figma exclusively for our UI work and during that time have managed to learn some great shortcuts and tips - stay tuned for our next blog post on Figma where we take a look at our Top 10 time saving tips.
Have you found your own solutions to any of our Figma frustrations? Or made the switch yourselves? We’d love to hear from you!