How to create Low Poly Art in Adobe Illustrator
Roughly a 4 minute read by Pippa Holman
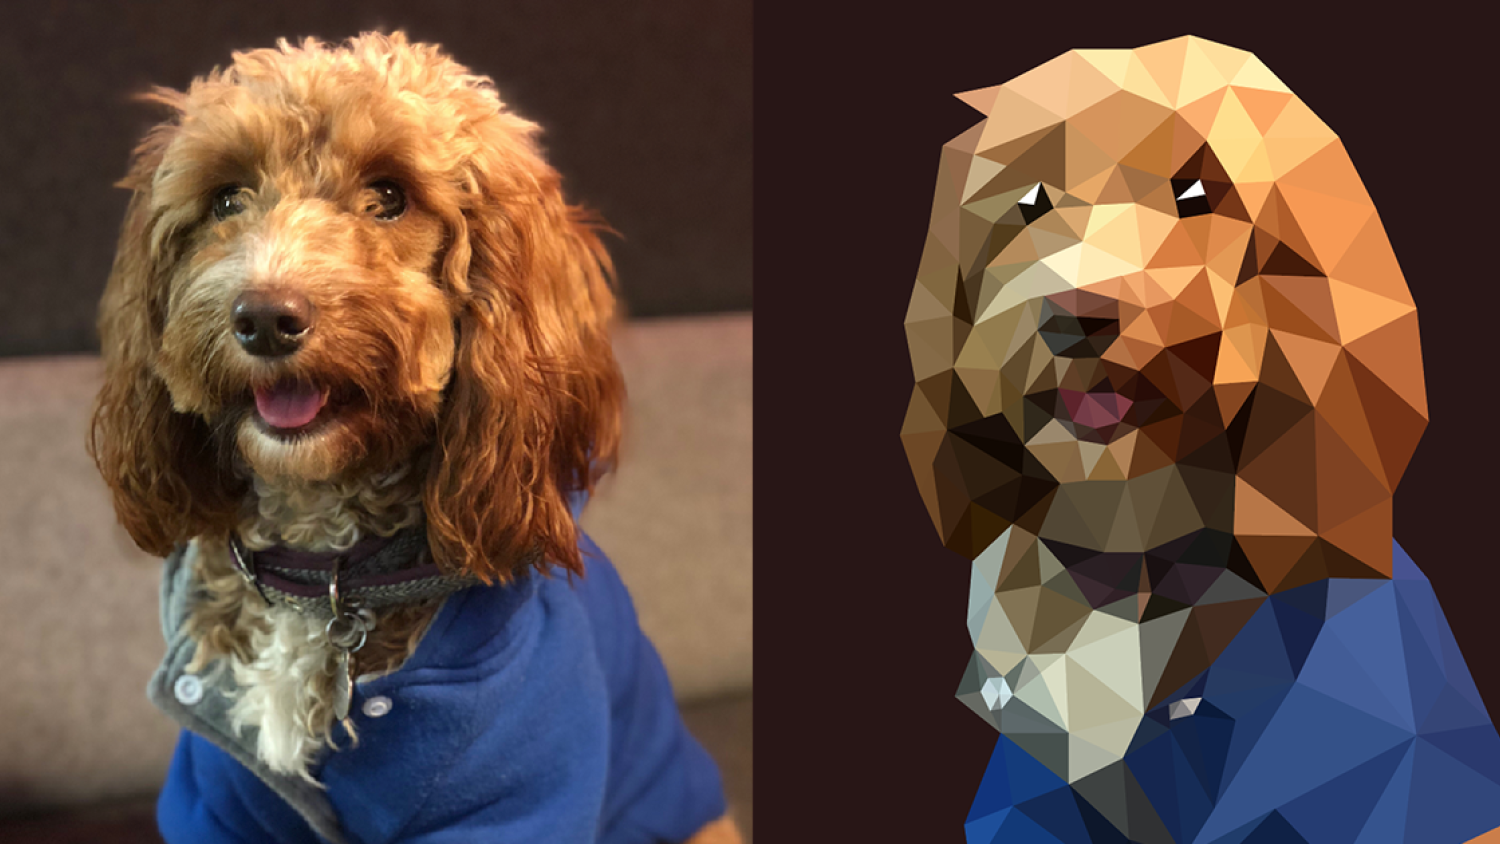
In this tutorial you’ll learn how you can create low poly effect artwork in Adobe Illustrator based on a photograph. The process may need to be practised a couple of times, but once you’ve done it once or twice, it’s easy to get in the swing of! Here I’ve used a photograph of one of our lovely office dogs, Betty, as an example.
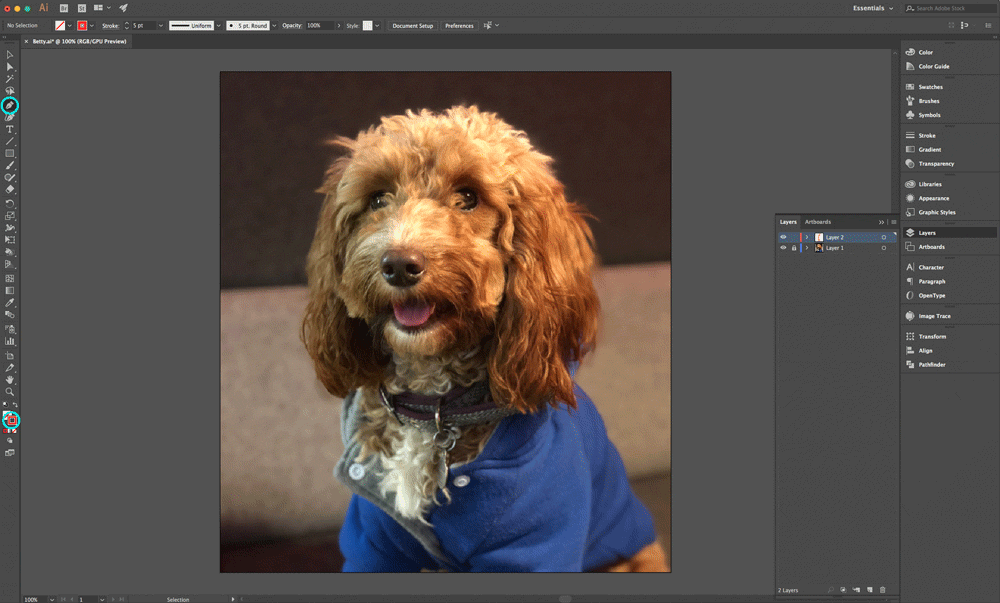
1 - Importing your photo
Set up a new document in Illustrator, and import the photo file you wish to base your design on. Create a new layer, and lock layer 1 with your photo in it.
2 - Using the Pen Tool
Select the Pen tool (p) from the tools panel. Give the path a bright colour and a thick enough width that it will stand out against your photograph.
3 - Drawing the triangles
Begin by drawing triangles over the top of your image. You can continually draw the triangles from one to the next without creating a new complete shape each time. For example when you’ve drawn your first triangle, you can draw 2 lines from this to create the next, which avoids any overlapping paths. Hold the shift key when you see your cursor turn to the minus symbol (As we don’t want to delete any anchor points) but we do want all the anchor points aligned on top of each other, and the triangles connecting.
Tips
- Draw small triangles for areas of detail, and large triangles for areas with less.
- You may find it easier to draw some of the details, like the eyes for example, first, then you can draw the surrounding triangles out from these anchor points.
- Try to keep your triangles with fairly similar length sides; avoiding too many long and thin triangles that don’t create the best aesthetic.
4 - Live Paint
Once all your connecting triangles are drawn, we now need to make it a live paint object so we can fill the triangles; as we’ve drawn the triangles continuously there are many open paths so we can’t simply just fill them. First select them all, then select Object > Live Paint > Make.
5 - Colouring your shape
You’ll need to be using both the Live Paint Bucket tool (k) and the Eyedropper tool (i). They both can be found in the left hand side tool bar; the Live Paint Bucket is hidden under the Shape Builder Tool. However, using the shortcuts will make things much easier. First select the Eyedropper Tool (i), and select the most common background colour from your photograph, from within your first triangle. Then switch to the Live Paint Bucket tool (k) and click to fill the triangle with that colour.

6 - Completing the colouring
Repeat this action: first picking the colour (i) and then filling (k) for each and every triangle, until you’ve filled your entire shape.
7 - Finishing touches
Hide layer 1 with your photo in it. Now select everything in layer 2, and remove the stroke. You should now have your low poly drawing!

This is still a live paint object – in case you want to edit each triangle like a normal shape, you need to select everything, and go to Object > Expand, and this will separate the shape into individual triangles.
