Simple character animation in After Effects
Roughly a 9 minute read by Pippa Holman
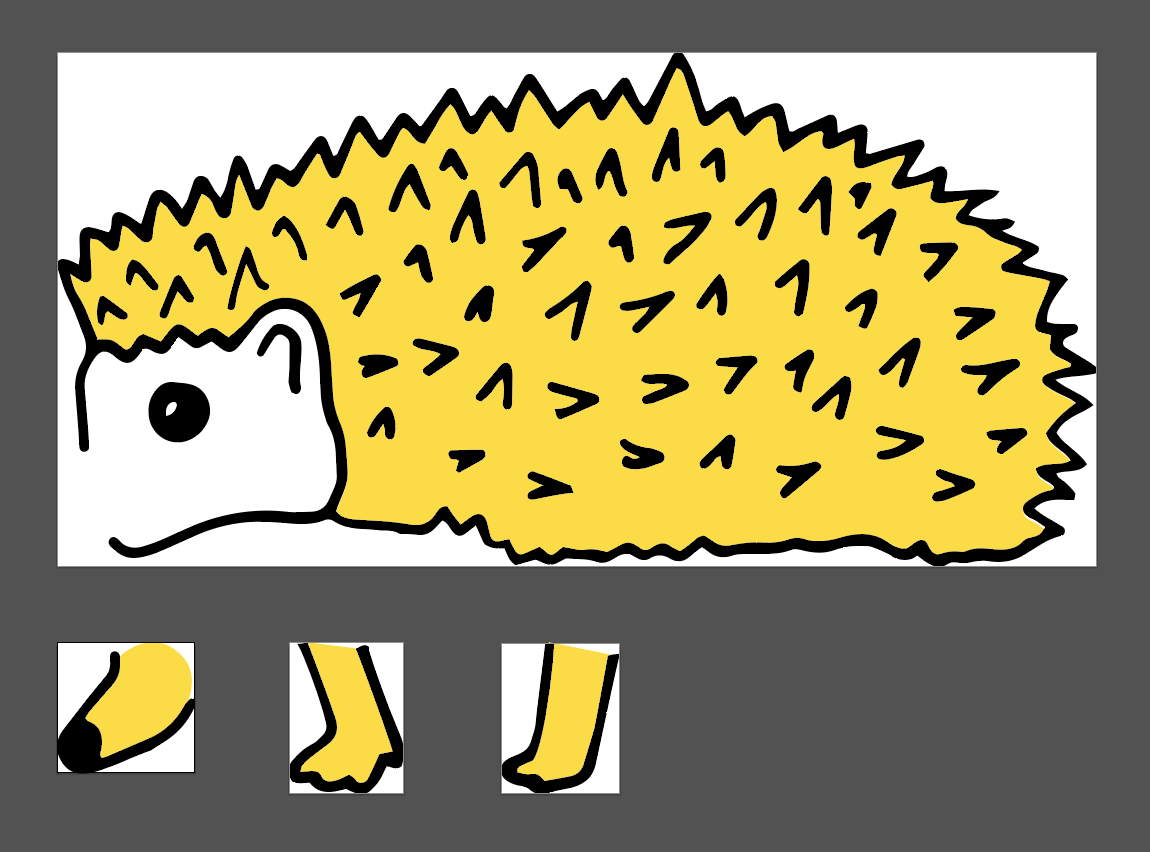
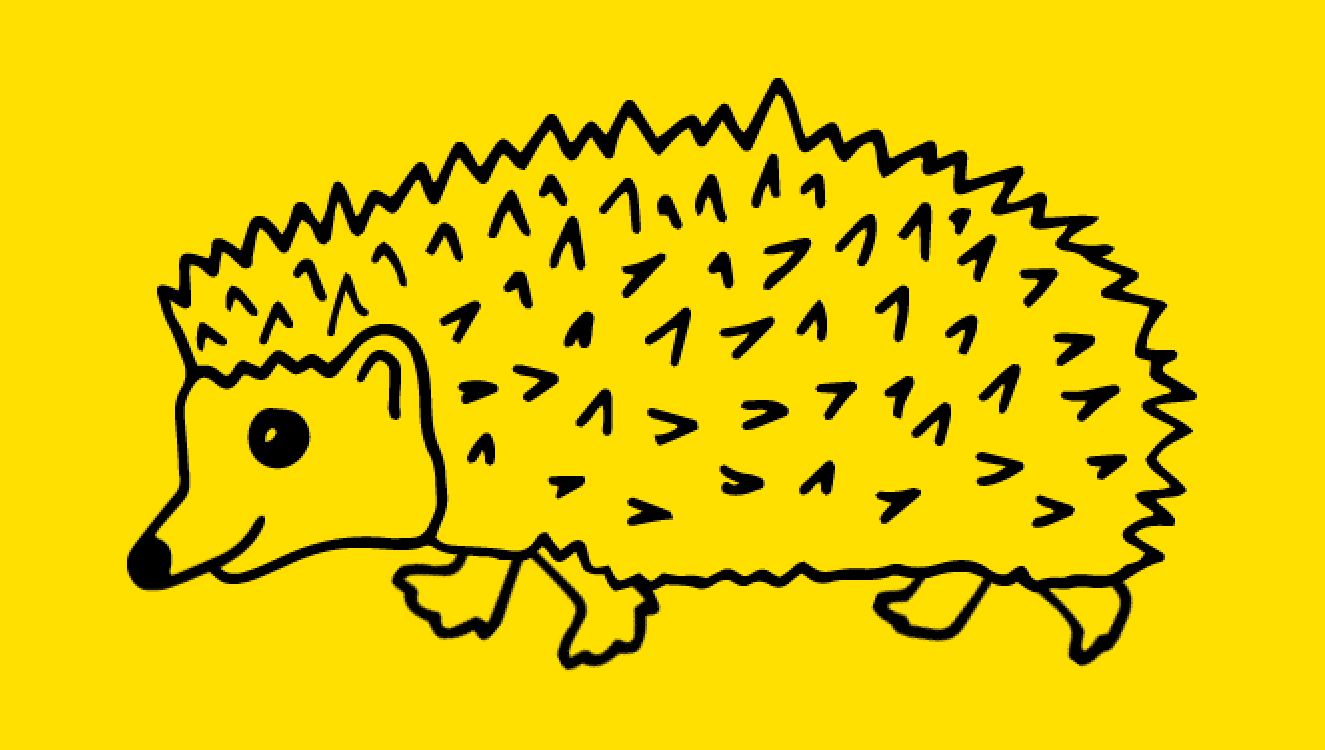
In this tutorial, we’re going to explain some simple animation techniques that can be used to give life to characters! As an example, we’re going to use a hedgehog illustration, which we’re going to animate walking off and onto the canvas. The tutorial is written for people with a beginner’s level understanding of After Effects.
1 - Create assets
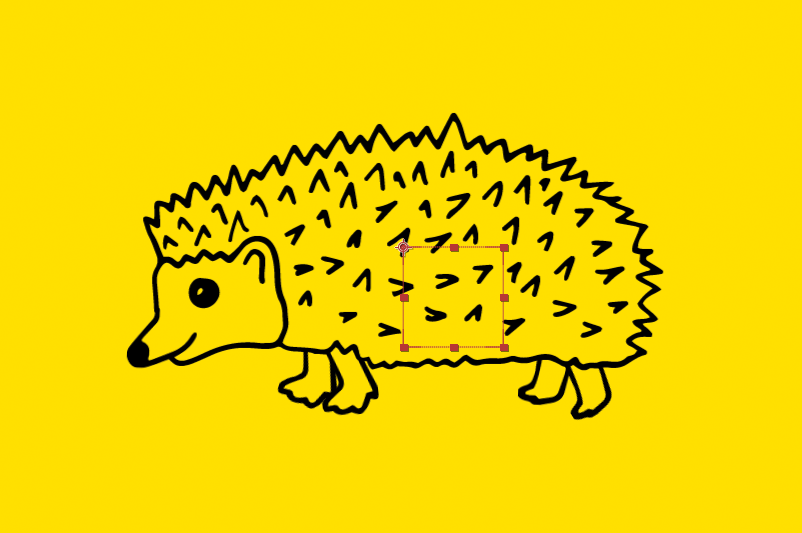
Start by creating your character and separating out the body parts that you want to animate. Here, we have extended the top of the legs to allow more room for movement. We’re going to use the same front and back leg twice, so you will just need 2 legs in total. Crop each artboard to the size of the artwork, and save these out into separate files.
2 - Set up your composition
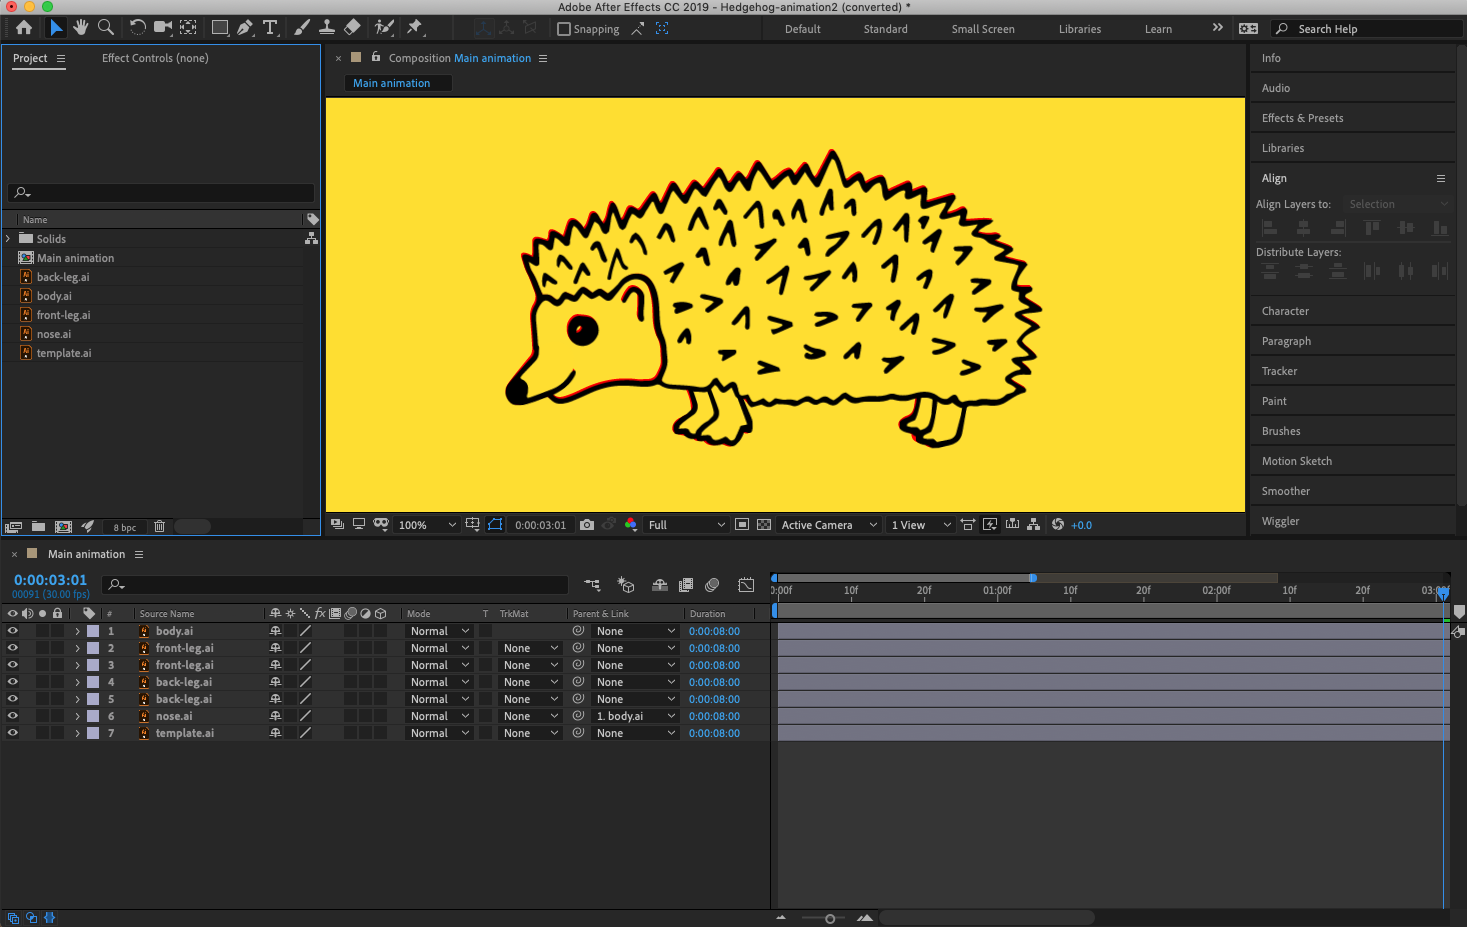
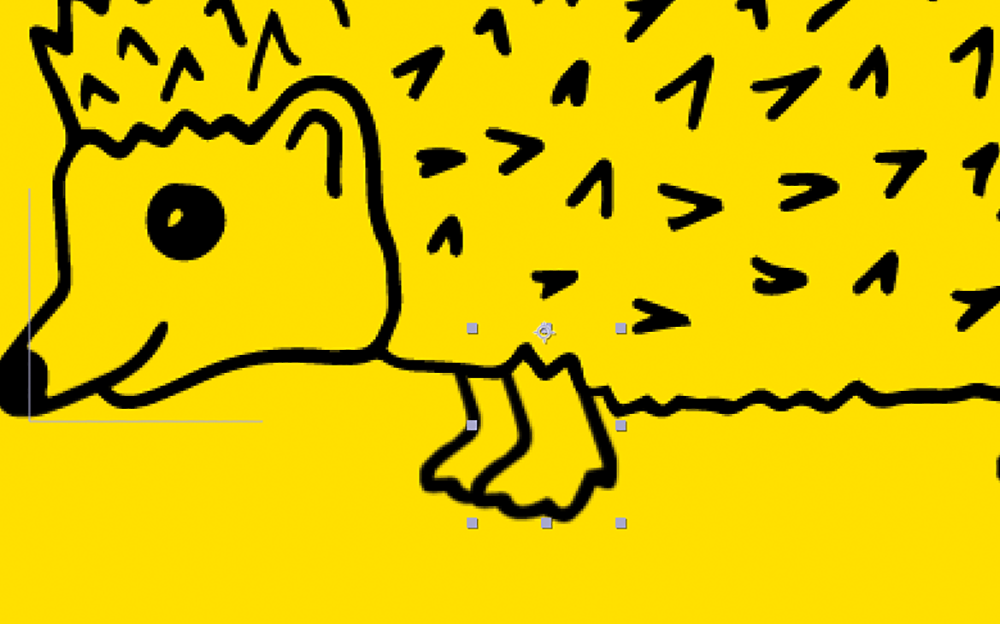
Import the files into After Effects and align into the correct positions - you can import a template of your original file to help with this and layer your individual assets over the top. We’ve duplicated the front and back legs to make 4 leg layers in total. Next, select the Anchor Point Tool and drag the Anchor Point in the centre of each leg upwards to the top of the leg - this will act as a knee joint for movement later on. Do this for each of your layers.
3 - Rotating the legs
We’re going to rotate each leg individually. Click on one of the leg layers and press ‘R’ on your keyboard to show the Rotation property. Click the stopwatch to create a keyframe. Rotate each leg until you’ve produced the natural walking stance.
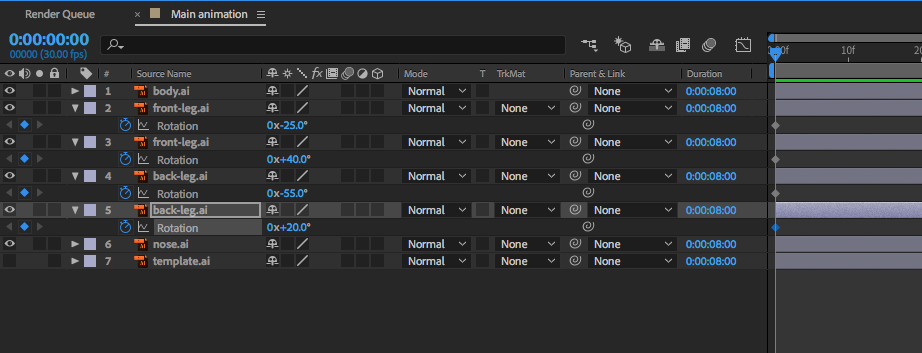
Now, go a little further along in your timeline, and rotate each leg in the opposite direction. Once this is done, copy each of the first keyframes, and paste a little after the second keyframe - so that you have 3 keyframes on each leg layer that are evenly spaced.
4 - Looping the animation
Now that you’ve created 3 keyframes that start and end in the same place, you can automatically set the animation to repeatedly loop. For this, we’ll use an Expression. To do this, Alt-click the Rotation property. You’ll see the numbers in the property turn red, and there’ll be a space in the timeline to type an expression. Type ‘loopOut()’, then once that’s in place click away from the layer to confirm you’ve finished editing it. If you scrub along the timeline you’ll see it automatically loops the 3 keyframes.
5 - Animating the nose
To add a little more character, we’re going to animate the hedgehog’s nose. We’ve moved the anchor point to the join between the nose and face, then in exactly the same way as the legs: rotate first in one direction, move along a little in time, rotate in the other direction, then copy and paste the first keyframe after the second to have 3 keyframes in total, starting and ending at the same rotation. We’ve again added the ‘loopOut()’ Expression to this, and made this animation happen twice as slowly as the legs. This means the legs and nose animations happen concurrently, starting and ending at the same time.
6 - Parenting
Any animation that we apply to the body, we also want to apply to the nose, so that it doesn’t get left behind! So we’ll need to Parent the body to the nose; which will mean the nose will follow the body’s movements. To do this, select the Nose layer, and under ‘Parent & Link’ select the layer ‘1.body’. Parenting is a powerful tool in After Effects; creating multiple linked layers, parents and children, can create multiple chain reactions and a whole variety of animations.
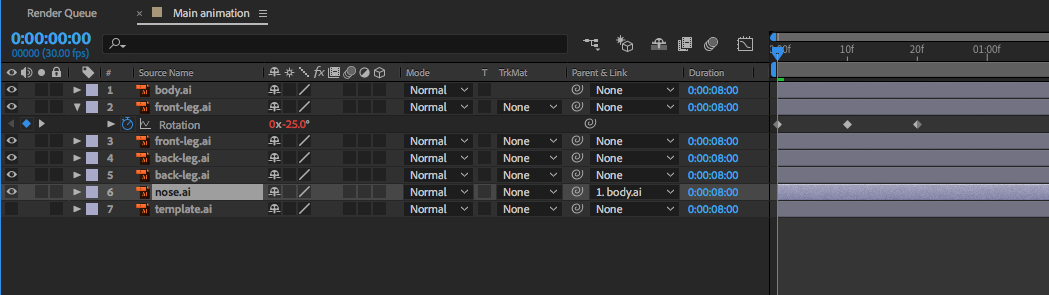
7 - Animating the body
Next, we need to animate the body moving up and down as he walks to make the movement feel more natural. We want his body to be high when his legs are upright, and his body low when the legs are at their most outstretched. Go to the start of the timeline, press ‘P’ to show the Position property, and click the stopwatch to create your first keyframe. Move the body first down when the legs are outstretched, then go to the keyframe at which the legs are vertical, and move the body upwards.
Finally, copy and paste the first keyframe at the end, a little way after the second, so that again you have 3 keyframes evenly spaced. The last should be at the same point in time as the second leg keyframe (when the legs are outstretched). Add the loopOut() expression to continue the body’s movement up and down.
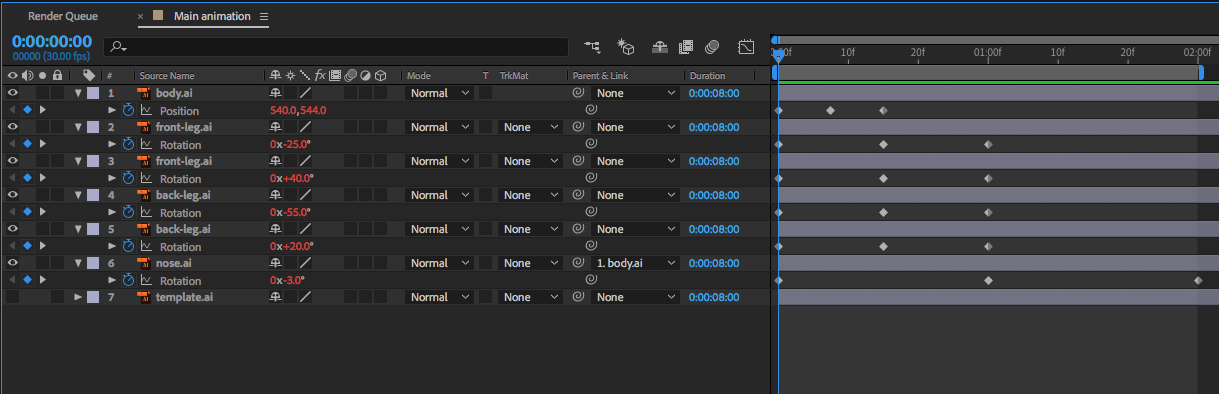
Everything should now be animating nicely together; you can see that as the nose is parented to the body, it is following the body’s up and down movements.
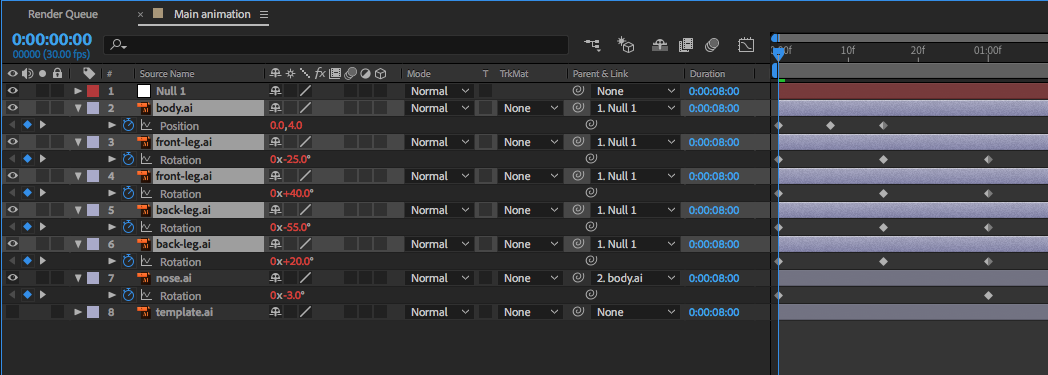
8 - Null objects
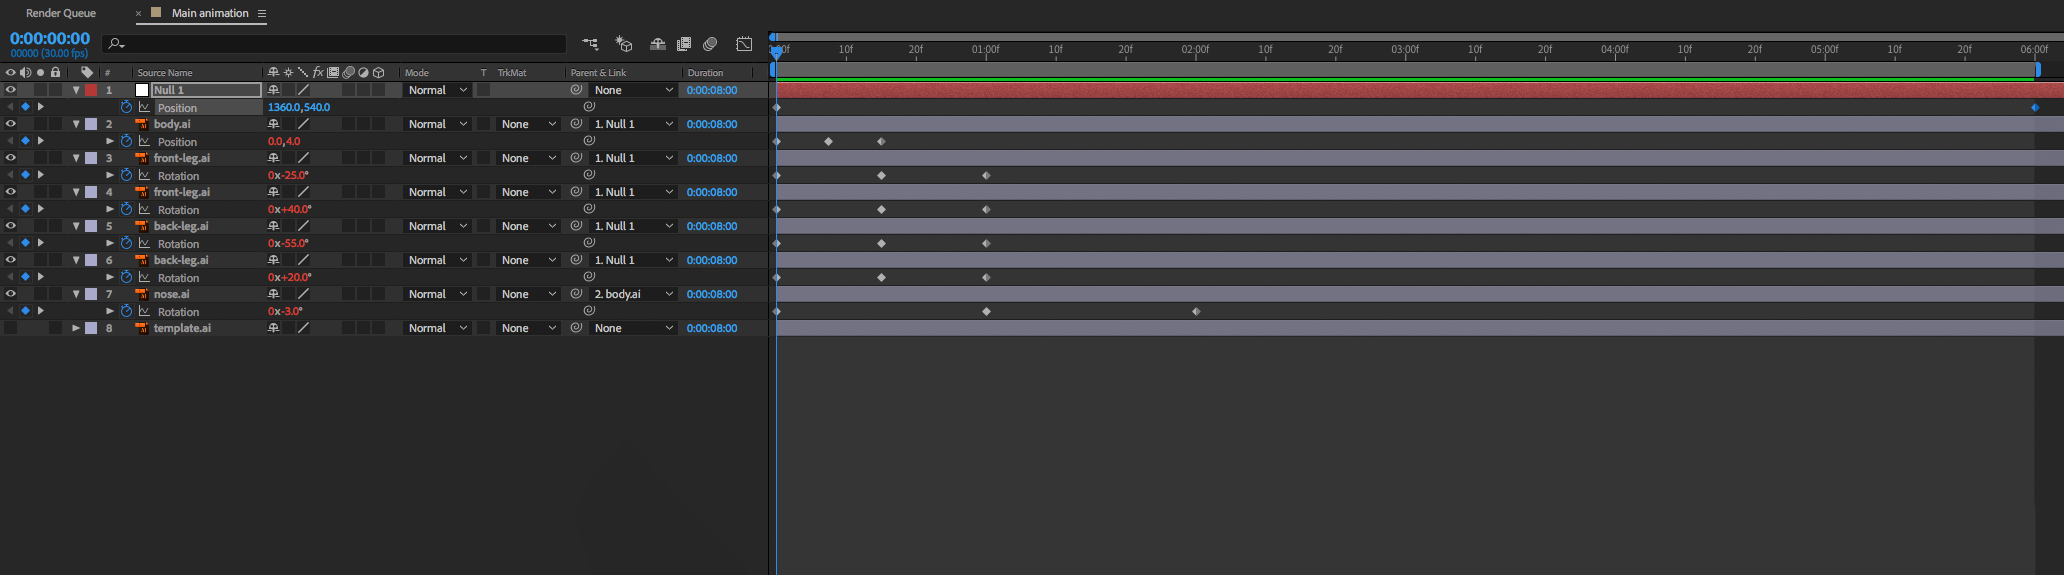
Now we just need the hedgehog to actually move forwards. We want all the layers: the body, the nose and all 4 legs moving from right to left. To do this without affecting the current keyframes and animations, we want to create a Null object that you can Parent everything else to. Go to Layer > New > Null Object. You’ll see a little square on your composition which is the null object, and you’ll need to position this so that it’s roughly central to the hedgehog’s body.
Next, select the body and all 4 legs layers, and set their Parent as the null object. You can leave the nose layer as it is, as it’s already following the movements of the body, and will subsequently follow the movements of the null object as the body is parented to it. If you now select the null object layer, and change its position, you can see everything moves with it.
Keyframe Position, and move the null object till the hedgehog is completely off the right hand side of your composition. Then move forwards on your timeline, and move the null object to the far left, again until the character is not showing within your composition. I’ve made my animation 6 seconds long in total, and the animations within this 30 seconds, 1 second, and 2 seconds long; so that each of the animations loop within this time period.
And voila! The hedgehog is away!