Taking back control of Adobe Photoshop
Roughly a 14 minute read by Adam Buchanan
Having spawned a constantly growing army of digital designers who have cast away the physical paintbrush, countless individuals such as myself have turned to Photoshop to sculpt a career out of arranging on-screen shapes.
Luckily enough for us, each and every release of Adobe’s graphics editing suite has further simplified its graphical interface thus making our graphical wizardry an easier task. That said, this providing of simplicity which allows us to focus on our tasks at hand has left us lazy and unwilling to explore the expanses of new features and power tools at our disposal. With this in mind, sit back and relax as I take you through several features and workflow techniques you may have missed or be yet to adopt.
Layer Comps
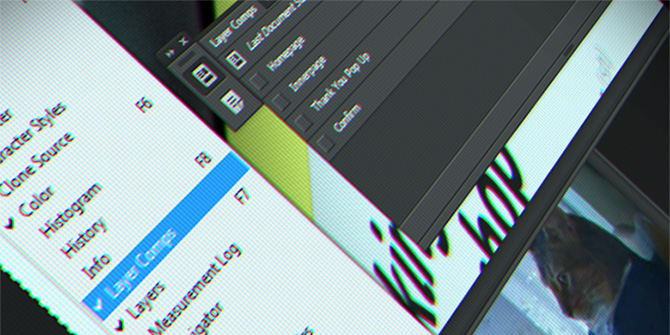
You’ve all seen this combination of two words on your Photoshop travels while navigating its GUI, but how many of you can admit to even making the most of them? Arriving as one of the most criminally overlooked features in Photoshop, Layer Comps are without a doubt one of the most useful additions to our pixel-pushing-package.
When creating multiple page designs for websites in Photoshop, many are hit with the issue of organisation and how to access other pre-designed templates. This troublesome affair is only worsened once another designer is tasked with picking up where the last left off - how can the next be sure they have hidden/shown every mandatory layer to make up each individual design? Needless to say Layer Comps address all of these issues in one fell swoop with a single click on our - now hairless and often tail-free - mouse.
Layer Comps are effectively a snapshot of whatever is visible on your screen at any point in time. By creating several of these and naming them as you wish, you’ll be able to click through each one and see everything in front of you change without even needing to hide and show countless layers. The days of excessively clicking our iconified eyeballs in the Layers panel are over - but that’s not where our story ends.
Layer Comps also harbour one more time crucial saving feature, which once used, you’ll have trouble going back to your old fashioned ways. Hidden within Photoshop’s “File > Scripts” lies a little automated action known as “Layer Comps to Files...”. This godsend will simply go through each and every Layer Comp you have created (or the ones selected) and export a JPG/PNG/PDF of your design to a location on your hard drive of your choosing, using its name as the filename with a prefixed number of the Layer Comp’s ordering. Like before we can wave goodbye to another time consuming pastime, as exporting each page design manually through the save dialog is a practice of yesteryear.
Just remember though, should any changes be made to an individual Layer Comp during the design process, don’t forget to update it.

Smart Objects
As we verge upon 2014, any designer caught today not making the most of Smart Objects would be better off moving over to the delightfully simple MS Paint. These PSDs-in-a-PSD are the swiss army knife of a designer’s toolbox and to even sculpt websites without them is akin to carving a wood statue with a toothbrush.
To bring you up to date, upon right clicking on any layer (or collection of) in Photoshop’s layer panel will present a number of options with one being “Convert to Smart Object”. Selecting this action will capture all of the data present within your selection and replace it with a nested Photoshop document.
This new creation will be identical to what was there previously, only with all of the selected layers now merged into one. This means that changes to individual assets can no longer be carried out directly on the canvas in front of you. To make amends from here on you’ll now need to open up this nested PSD by double clicking on the new icon which is now present in its layer thumbnail. A new window will open up containing your selected layers in the exact same arrangement they were previously, only this time round they are isolated in their own document.
So why on earth would you want to combine several perfectly good layers into their own self-enclosed pixel-prison? Take a look at this whole host of new features that were previously inaccessible and get ready to cage up your layers:
Controlled Duplication
Same assets, one instance!
During the creation of multiple website page templates in Photoshop, you’ll often be presented with the issue of having identical modules over several pages, only in different places. While creating duplicates of a standard layer/group and moving them around is perfectly fine, should an amend fly into your inbox for this specific module then you’ve got the painful task of carrying it out several times over. Instead of tearing out the bristles in your brushes panel, make the most of Smart Objects.
When a Smart Object is duplicated, instead of it becoming a unique layer it becomes an instance of the object it was copied from. This means that should its contents be manipulated in any way once opened, these changes will be applied to every duplicated copy of this layer - saving you more than enough time to get the kettle on.
Note: When you need to duplicate a Smart Object but don’t want the two layers to behave the same, you can right click a Smart Object layer and select “New Smart Object via Copy” to create a unique instance.
Resizing without worry
Increase the size over 9000?
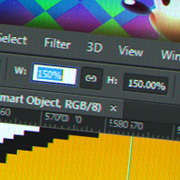
Time and time again as designers we’re asked to make logos bigger and bigger, so much so we’re left wondering why there isn’t a one click feature in Photoshop to address this frequent request. Smart Objects are our saviour in the logo’s quest for document domination, as long as you prepare for the journey ahead.
When first importing a client’s logo into a design in Photoshop, your best bet is to leave it at the largest possible size available and then convert it to a Smart Object. After doing so, resize the logo Smart Object down to the size you want and prepare to be amazed. Upon double clicking the Smart Object’s icon on the layer’s thumbnail, the new window which opens up will present the logo at its largest possible size - the very same size you originally captured it at. This means you can now enlarge it when asked to without needing to worry about blurring bitmaps, as long as you don’t exceed the size it was imported at.
Then again, we could always dream of always being sent logos in vector format...
Crisp, editable (and delicious) vectors
Dress for the occasion
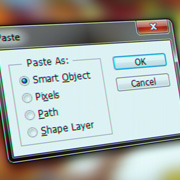
One more advantage to Photoshop’s Smart Objects is its cross-software compatibility with other software packages from Adobe. For example, should you ever attempt to copy and paste artwork from Illustrator, Photoshop will display a pop up box offering several options. At the very top of these choices lies ‘Paste As: Smart Object’.
While we could paste artwork from Illustrator as Shape Layers and edit them directly in Photoshop, we would need to import each and every layer separately and correctly line them up once again. Instead, by importing artwork as Smart Objects we can bring over complex illustrations into Photoshop with one paste, whilst maintaining the ability to edit them again. Like other Smart Objects, this new layer’s thumbnail will also feature an icon, one which once double clicked on will open up our pasted artwork, only this time in Illustrator - just make your changes in the vector editing suite, save and head back to Photoshop to see your updated artwork.

Non-destructive workflow
Non-destructive workflow might not be anything new, however, it’s still a practice I’m yet to see carried out on a more regular basis. The theory behind it is to ensure that any modifications to sensitive items such as photography are carried out on accompanying layers.
Not quite following? A good example here is working with photographic elements clients have supplied. If you have a photograph which needs brightening up and its background removing, the easiest way to go about this would be to edit the layer’s brightness/contrast and use the eraser tool to eradicate the unnecessary image data. While there is nothing wrong with this approach, it does leave us with the same old issue of what to do should amends come in for this area of our design. You can’t return erased pixels from a document you closed two days ago nor can you revive lost colour values that have been forgotten through adjusting levels.
Although a basic example above, ensure you’re using the following tricks of the trade within your creations to take control of your pixel’s past, present and future.
Use Layer Masks to remove unwanted data - Instead of resorting to the lazy eraser tool, any time you need to clear pixels from a layer you should make the most of masks. These grayscale-sidecars to our layers allow us to paint out any areas we no longer want to see without touching the original artwork. In order to use these, simply have the layer you want to edit selected and click the ‘Add Layer Mask’ button on the lower section of the layers panel - now paint away and pretend that you’re still holding that dirty eraser.
Cut out complex areas with Vector Masks
The magic wand is so last year
While the introduction of Layer Masks is a crucial addition to anyone’s future-proof workflow, they shouldn’t really be used on detailed photographs or graphical elements where you need to bring key sections away from their backgrounds. If and when we need this control, we should resort to Vector Masks.
Select the layer of your choice, unleash the pen tool from Photoshop’s toolbox and begin carefully plotting the outline of your desired trimming. Once completed, simply right click the canvas and select Create Vector Mask. Your layer will now have a vector path applied to it to which any overlapping pixels are hidden from view. The added bonus to this precise outline is that it also allows you to manipulate its points freely at any time, allowing you to redefine its edge whenever you want.
Manipulate image data with Adjustment Layers
Recolouring without the paint
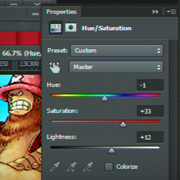
Unless you’re certain you’ll never need to change a layer’s brightness, contrast, levels, hue, saturation and vibrance more than once, then Adjustment Layers are for you. Instead of manually applying our adjustments to layers directly through the Image > Adjustments menu, we can make the most of another small button at the bottom of the layers panel - Create New Fill or Adjustment Layer.
This handy option will allow you to choose one of the many adjustments we can usually apply to layers, only it will be created as its own editable layer. From here you can change all the values you want without destroying the layers underneath that are being affected. This non-destructive approach not only allows you to return to carefully amend layers which have been deemed ‘too bright’ or even ‘too dull’, but it also allows you to carefully dictate which areas of graphics you want these adjustments to be applied to. As each new adjustment layer comes with an accompanying layer mask, you can easily blackout areas of the visuals below you do not wish to receive the added vibrancy or desaturation you’ve created.
Organisation
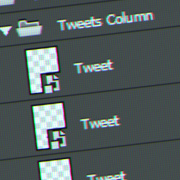
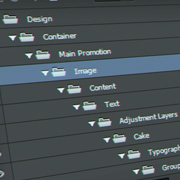
Let’s face it. Nobody wants to be told their Photoshop documents (or anything for that matter) are messy collections of unnamed assets with next to no structure - but how many of you are willing to be honest about it? Unless you’re grouping up your layers, naming folders and arranging everything in a structured order, there’s room for improvement.
The importance here not only comes from ensuring the design process is a breeze, but also something mentioned previously... There’s always the chance that other designers will need to take over your creations at some point (whilst you soak up the sun or cough from your gripping illness), but that doesn’t mean they should have to also dive into your chaotic mind and decipher how you have supposedly ‘organised’ your work.
Before you throw obscenities in my direction and claim your documents are perfectly fine the way they are, take a deep breath and hold it as I prove to you how easy it is to stay in control of chaos.
Grouping with ease
One hit combo!
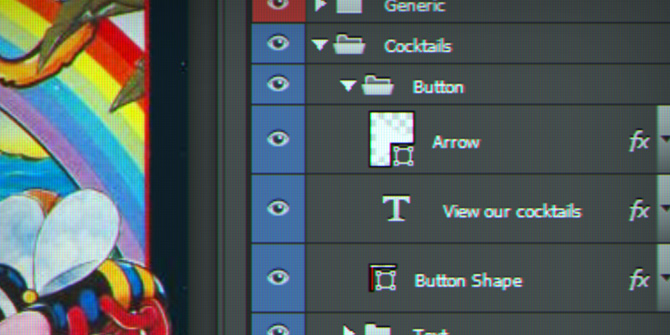
There is no longer any excuse for not carefully grouping your layers from here on. After selecting the layers of your choice, simply push CTRL + G (or CMD + G for the fruit-aficionados) and a new folder will be created holding these layers.
Name your layers/groups
No excuses...
We’re all guilty of leaving our assets with the identifications of ‘Layer 64’ and ‘Group 3’, but as soon as that Photoshop document is closed and you’ve headed home for the day, can you really recall what was in Layer 13?
With Photoshop CS6 and beyond, the naming of layers and groups has become even more crucial thanks to the introduction of Layer Search. If you get into the habit of carefully labelling your work as you go on, the benefits of searching will soon present themselves. As you casually type into the input box ‘Long Shadow’, ‘Flat Button’ and whatever other buzzwords you’re assigning to your work, you’ll be amazed how easy it is for yourself, and any others, to access your creations.
Removal of Layer 12 copy copy copy 3
One click away...
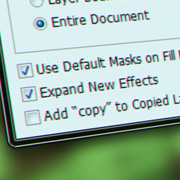
Although making an attempt towards renaming your layers and groups is a step in the right direction, Photoshop will pull out all the stops to place you back in your lazy ways. By default, any layer or group that is duplicated will have the word ‘copy’ appended to the end of its label.
While we can easily remove this by editing its label every time we duplicate layers, it’s a time wasting practice that can be avoided by disabling Photoshop’s meddling ways. Simply head on over to the Layers panel and click the tiny arrow and three lines in the top right corner of the box. Within here you’ll be presented with a number of choices, with ‘Panel Options’ being the one we’re looking for. The resulting options presented not only allow you to change several features of the Layers panel, but also offer to prevent Photoshop from ever daring to speak the word ‘copy’ again.
Conclusion
While I do expect the majority of digital designers reading this to be aware of most of these shortcuts and sidesteps around Photoshop, nobody can refuse a refreshing course in Adobe’s toolkit.
Should you happen to adopt some of these tricks into your next Photoshop project or happen to know any more for the taking, be sure to let us know below. In the meantime I’ll be perfecting more tricks from the Ye Olde Photoshop Spellbook in preparation for this article’s follow up.