After Effects tips & tricks every animator should know: 02 - Advanced Text Animation
Roughly a 3 minute read by Adam Buchanan

Following on from our first tutorial discussing a technique to mimic Photoshop’s very own Clipping Paths, we’re back to discuss another powerful feature of After Effects - Advanced Text Animation.
Within After Effects just about every layer you place onto the timeline can be animated through properties such as scale, rotation, anchor points, and transparency. While these are irreplaceable features at our disposal, they’re somewhat limiting when it comes to text layers. This is due to the fact that these top-line properties manipulate an entire layer, rather than individual elements of it.
Take for example this very sentence. If you were wanting to fade in each character through traditional methods, one by one you’d need to setup 31 individual text layers, each requiring some sort of animation too.
This of course is far from ideal and thankfully After Effects has a very powerful text animation tool which gifts you full control over each and every character within any text layer.
In this tutorial we’ll take our original example a step further. We’ll drop our sentence from above the screen letter by letter, along with giving each character a slight rotation to counter before landing.
How to:

- Create a new text layer and type in a short sentence.
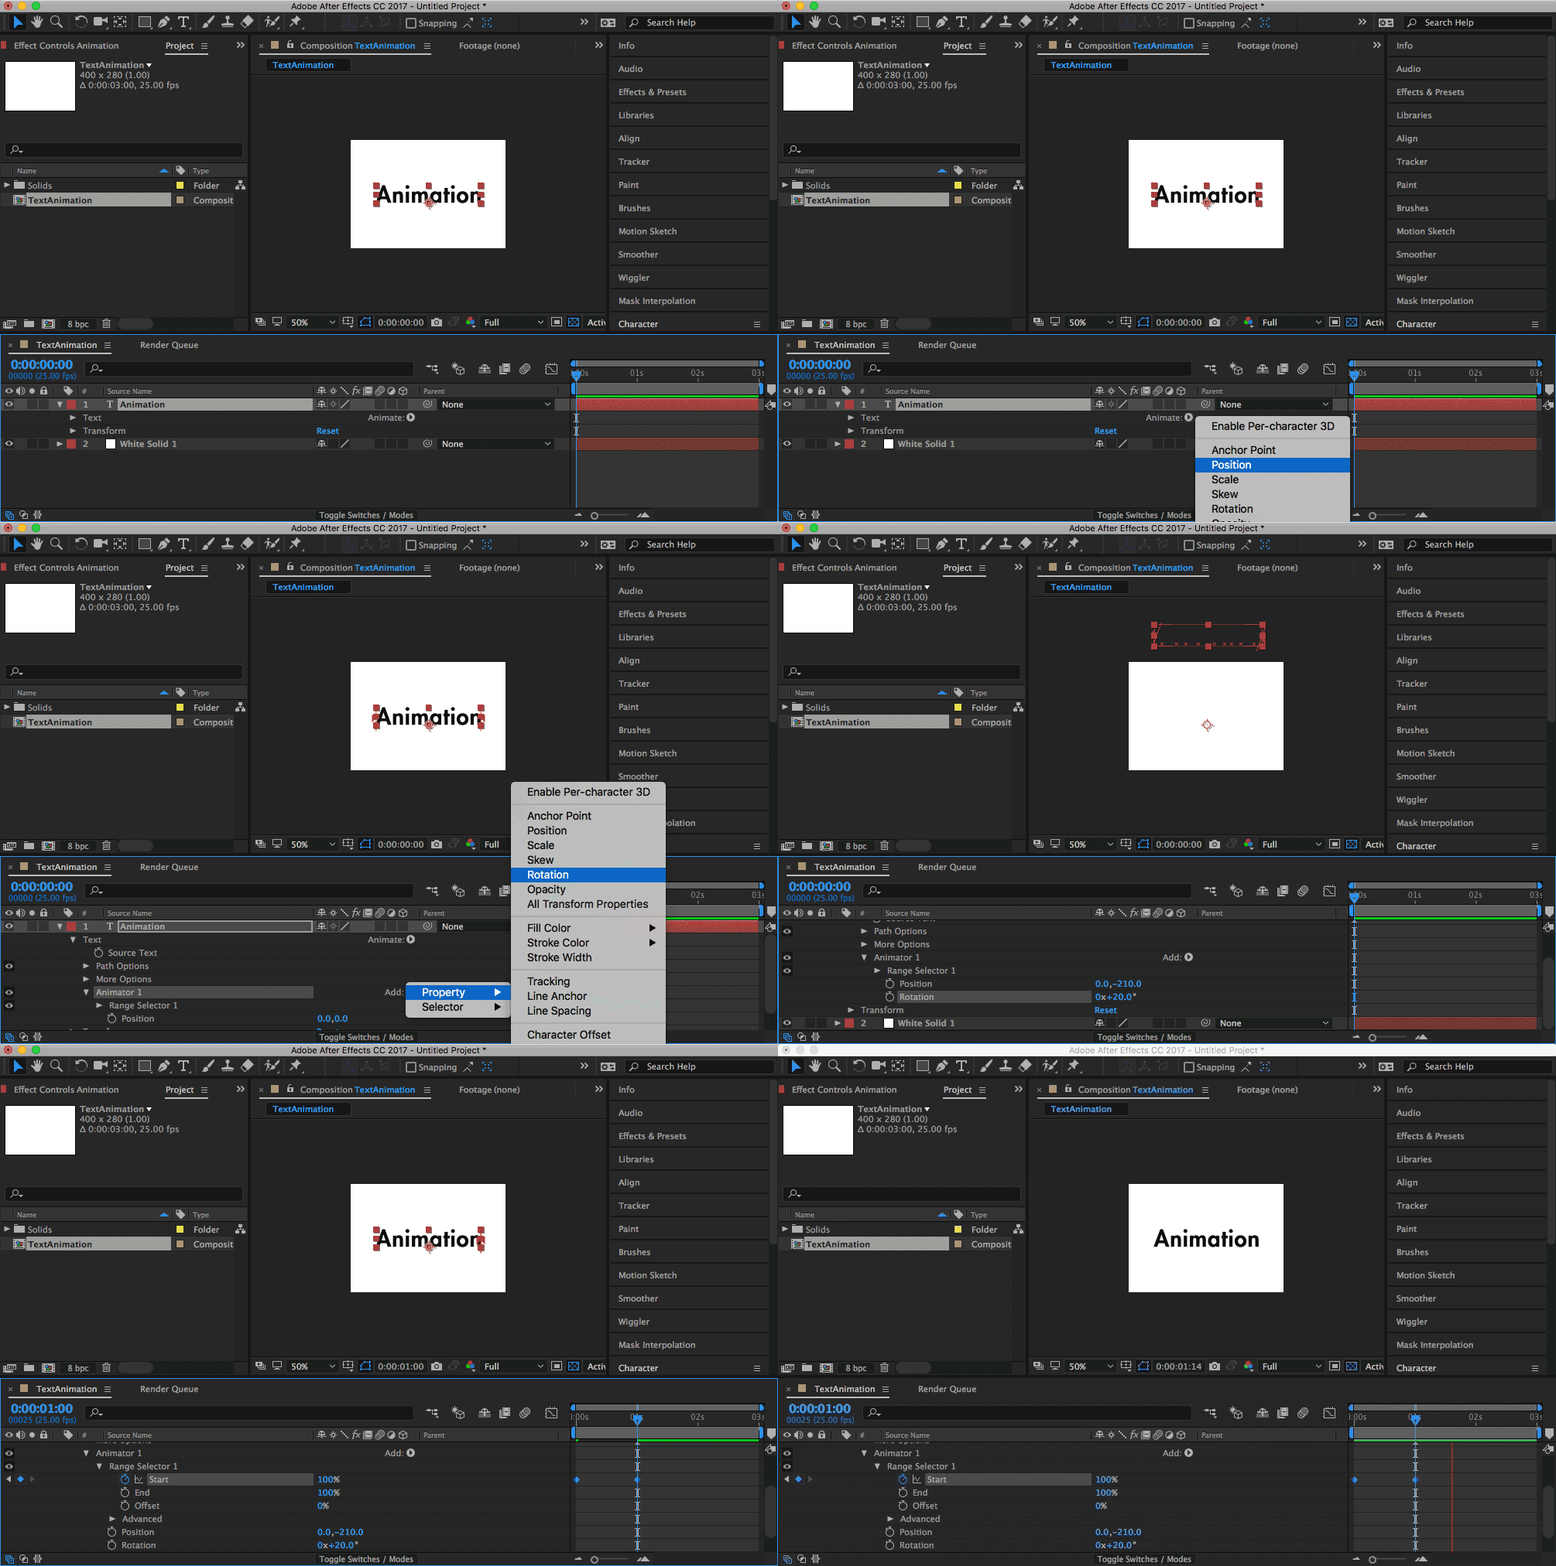
- In the timeline click on the text layer’s ‘animate’ arrow button and select Position.
- Click on the ‘animate’ arrow again and select Rotation.
- This should add two new Position and Rotation properties which live within ‘Animator’ under its ‘Range Selector’ dropdown.
- In here edit the Animator’s Y Position value so that the text moves up and out of view.
- Next give the Animator’s Rotation a new value of around 20 degrees to set its starting angle.
- With these two values set, expand the Range Selector properties and keyframe the Start value at 0%.
- Move along in time by a few seconds and keyframe the Start value to be 100%.
Summary
This example is only scratching the surface of what can be done with text animation. The animators applied to each text layer can be stacked, given additional properties, and of course be controlled by expressions too.
Bonus: If you’re feeling ambitious take a look at the Wiggly Selector combined with the Fill Color property for some psychedelic typography.